|
Step
21. THE
HEAD CONTINUED . . . .
You
can now carry on drawing, and bandsawing filling in the extra details.
The trunk
I gave lots of bandsaw slices, and alternative slices were then scaled
in creating the
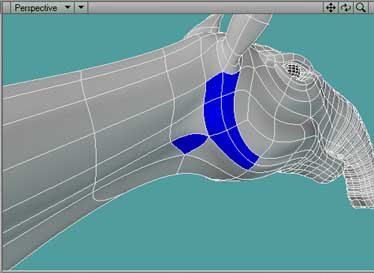
folds. You will see that I try to run the contours from the jaw all the
way up and
around the top of the head, this looks tidy, but also avoids us having
too many points
running from the jaw down the neck and into the body. The Ears again like
the other
elements, work on seperately. Draw a front on outline and extrude it like
we did with
the torso and head. Then selecting a few of the polys on the front, Smooth
Shift,
Scale, Smooth Shift, Scale until you get the look right. Here I have managed
to keep
the base of the ear as a single quad, making it a lot easier to attach
to the head.
Attaching
the head to the body is exactly the same process as the toes and foot/leg.
You will probably have to add more slices to the neck and down the body
to equal the
head's, but think about what you can do with these extra slices. Also
a triple. ie a 3
point poly does not hurt in some places. You can lose those extra lines
in places that
aren't going to be noticed like in the join between the legs and the chest,
up a nostril
or inside the mouth.

Fig.
29. The countour flow nicely from the jaw over the top of the head.
The
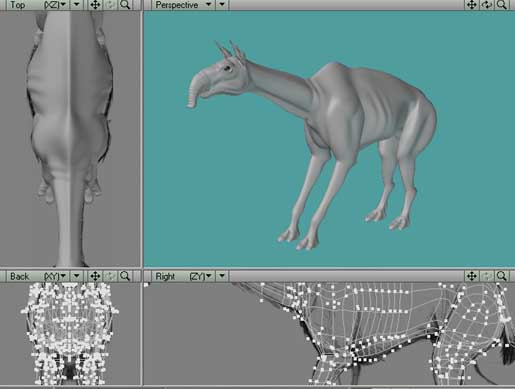
extra slices can be used for defining the back bone, for adding flappage
under
the neck and creating a chest bone. In this the final model you will see
I have also
used the Bandsaw to give my beast some folds at the base of the neck and
some ribs.

Fig.
30. With final tweaking we can add details, such as ribs and folds in
the neck.
To
conclude, I hope this tutorial has been of use to you, in both the approach
and the
execution and wish you the best of luck with your organic modeling.
If
you do have any questions or corrections please don't hesitate to Email
me at:
rpg_digital@yahoo.co.uk.
Russell
Gooday
BACK
1 PAGE CLICK HERE . . . . TOP OF PAGE CLICK
HERE . . . .
|