|
Step
20. BACK
TO THE LEGS
The
front leg can be built in exactly the same way as the rear. You should
even be
able to cut the foot off the rear leg and sew it onto the front leg, avoiding
any
unnecessary remodeling. Here you can see that I am trying to put some
muscle
details in, I think the area is known as the Quadriceps in humans, but
don't quote
me! The exact same technique is used, as we used on the heel of the foot,
in the
previous steps
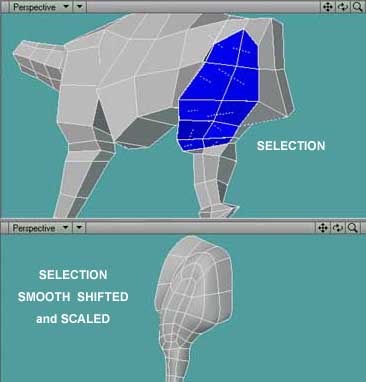
Fig.
22. The muscles around the thighs can be formed with
help from the smooth shift and bevel discussed earlier.
Step
21. A
TIDY UP
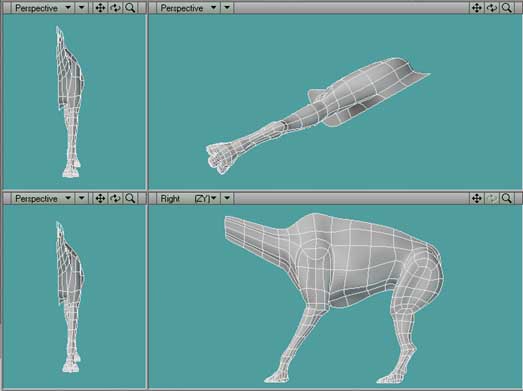
A
few more details and a tidy up have been done on the body. A few slices
with the
Bandsaw here and there. The Bandsaw will let you define areas a bit better,
for
instance around the neck I have added a couple of slices, and pulled them
in close to
the existing neck muscle to give a more pronounced form. You will also
see that
those same lines have been pulled into the centre over the back, where
we want a
smoother less defined area. It is also worth, as I mentioned before, thinking
ahead.
There are still details which need to be, or can be added, but we still
haven't built the
head and we don't know what effect this is going to have on the body model.
Remember the toes and the foot/leg. So now let's look at that!
Step
21. THE
HEAD
As
far as the head I will give you a start and a few pointers along the way.
I am not
going to give you a full step by step. The process involves using the
techniques we
have discussed, such as Bandsaw and point dragging, but also involves
making
mistakes ie. ' Well that didn't work, let's try arranging the polys this
way'. That is the
way to learn.
(i).
The modeling can be approached, as I said, in similar ways to that we
have
already discussed. In Fig. 24 we have built the outline, as we did with
the torso,
ready for extrusion.
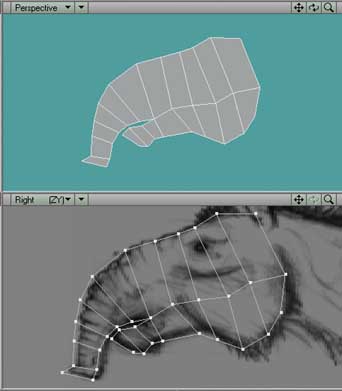
Fig.
24. A safe and easy start point of
creating our outline, ready to extrude.
(ii).
The outline is extruded and the points around the mouth and trunk are
scaled in.
You
can see the shape starting to take form already.
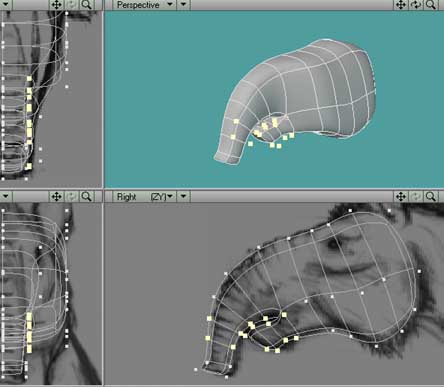
Fig.
24. Extruded, and the points scaled.
(iii).
The Bandsaw is then used to give me more detail to work with and I have
assigned an are for the eyes and deleted. The points above and below the
Bandsaw
line on the trunk are pulled in on the X axis to bring back the rounded
shape.
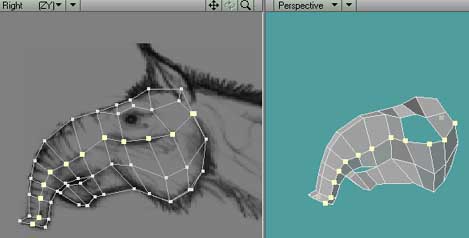
Fig.
25. The Bandsaw is used to add another line of detail.
(iv).
I have added a few more details here. The gap for the eye I made into
a polygon
and beveled in, fine tuning the position with the Drag tool. I then used
the Bandsaw to
give me another ring around the eye, and the bottom few polygons I Smooth
Shifted
out to make the bump under the eye.
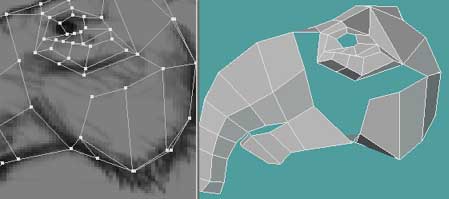
Fig.
26. The eyes are added and the cheek is prepared for a clean up
(v).
Now, to make a model clean, you want to try and consider the contours.
Around
the cheek, and jaw area I would like to address this, so I have cut a
few polys out.
See Fig. 26 and I will redraw them. Often with head modeling you will
have to do this.
Some modelers even prefer to draw the whole model point by point.
Using
the side view and my Point tool (Press +) I have created a few points
and
converted them into polys. Then I have selected the surrounding points
and filled in
the rest of the polys. You will see that the Bandsaw is needed on the
bottom of the
bump, up to the eye, and that two slices need to be added to the top poly,
infront of
the eye. See fig 27. You will also see we have a nice rounded flow of
polys in the Jaw
area See fig 28. This technique can be applied in other parts of the model.
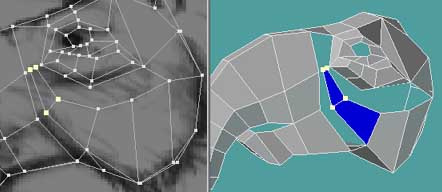
Fig.
27. I start to create some polys following the contours.
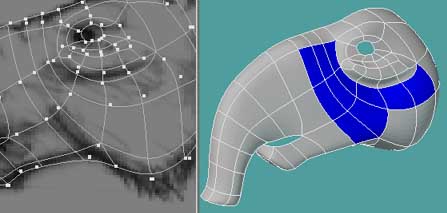
Fig.
28. There is now a nice contour formed in the Jaw area.
NEXT
PAGE CLICK HERE . . . . BACK
1 PAGE CLICK HERE . . . . TOP OF PAGE CLICK
HERE . . . .
|