|
Step
7. MODELING
THE REAR LEGS
Back
in Step 3. two quads were allocated to the rear and front legs. Select
the
rear leg quad only, go
to the Multiply Tab, select Bevel (or Press b) and
Bevel the
selected quad out on the X axis as shown.
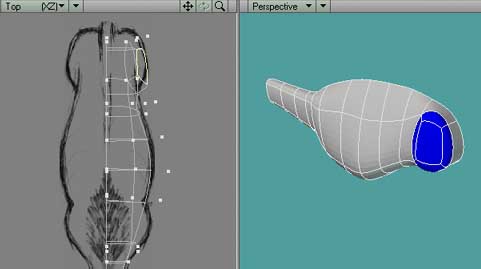
Fig.
7. The Rear Leg Quad is beveled out to approximately
the shape of the Top Reference Image.
Step
8. Now
selecting the bottom polygon, from this Bevel , Bevel again (Press
b),
beveling it down on the Y axis. Select the bottom points and with the
Move (Press t)
or the Drag (Press Ctrl t) arrange them, so that they follow the BG Image
in the
Right View. You should have something like Fig. 8.
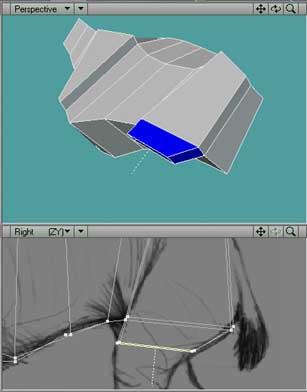
Fig.
8. We are starting to bevel the quad
downwards to form the Rear Leg.
Step
9. Keep repeating
the process of Beveling and Dragging until you reach just
above the toes as per Fig. 9. In this example I have also straightened
out all the leg
points from the Back View so that they run parallel. This gives us a better
base to
start creating the form in the other axis.
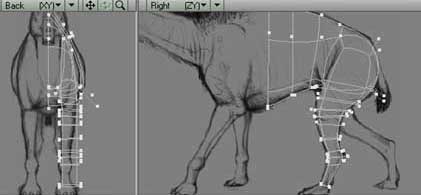
Fig.
9. The Beveling process is carried on
down all the way to the toes.
Step
10. Looking
at the Back reference Image and going by a little knowledge you
can start to give the leg a little bit of extra form as per Fig. 10.
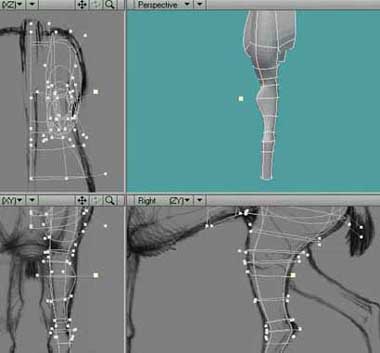
Fig.
10. A bit of Point Tweaking time, to
put a bit of form into the legs.
Step
11. MODELING
THE REAR TOES
Right,
we are going to leave the legs for a moment, and concentrate on making
the
toes. This will start very much like the torso with a cross section profile.
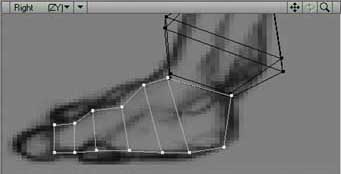
Fig.
11. The Toes are started on a separate layer
Step
12. Again we
want to make an extrusion, but following the extrusion select the
end poly(quad), which will make the Claw and bevel it in and back on it's
self, before
beveling out again. I have highlighted this area in Blue just so you can
see. Also note
it pokes out of the side of the toe, don't worry, this will disappear
when it's nurbed.
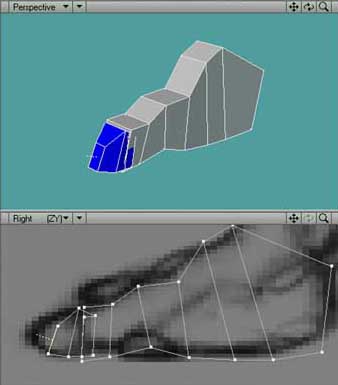
Fig.
12. The first Toe is extruded and the Claw beveled out.
Step
13. Now it's time to add the other toes. Duplicate this Middle
Toe, and scale it
down using the Right Reference Image as a Guide. You might want to do
this on a
separate layer. Line it up close to, but not touching, next to the middle
toe. Then,
where we are going to join the two toes together remove the facing polys
as indicated.
These polys need to be removed or after merging the points and nurbing
our model,
you will notice a nasty looking tucking effect.

Fig.
13. These faces are removed to avoid tucking
when we sew the toes together.
Step
14. Now we need to select the points along the seams, ready to
merge the toes
together. The seams are where we have just cut the faces from in Step
13.
The
most efficient way of doing this is to use the Merge Points/Absolute distance
Setting. This will join points together that are closer than a specified
distance. Using
the rule (Press q) measure the distance between the Middle toe points
and the Left
toe points, in this instance on
the X axis,
to get an average distance. Making sure
your toe objects are on the same layer, now select Merge Points (Press
m) from the
Construct Tab, select Absolute and enter a value just above that average,
for an
average of say 1mm gap, enter 2mm as the specified distance. Due to the
fact the
Quads' scales here are alot bigger than our distance, the selected points
should only
merge on the X axis, which is what we want. I hope this makes sense.
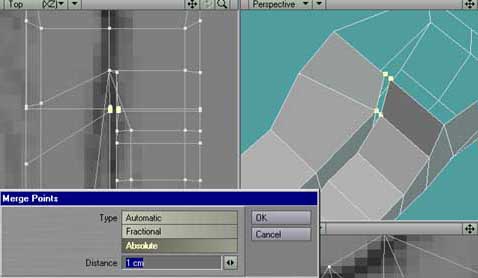
Fig.
14. Four Points are about to be merged together closing the visible gap.
If you measure the gap beforehand you can merge all the points in one
hit.
Step
15. Repeat Steps 13 and 14 for the right toe.
The
three toes actually taper out at the claw end, so with the Taper 2 tool,
which is
under the Modify Tab, go to the Back View and taper out. You should now
have
something similar to Fig. 15. And that's out toes ready for merging onto
the leg!
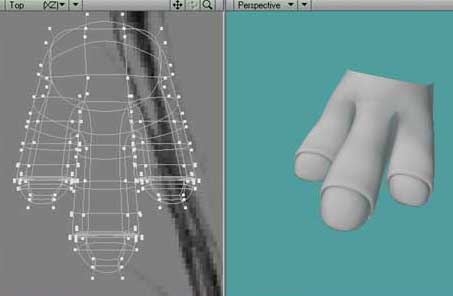
Fig.
15. The toes tapered, ready for sticking onto the leg and foot.
NEXT
PAGE CLICK HERE . . . . BACK
1 PAGE CLICK HERE . . . . TOP OF PAGE CLICK
HERE . . . .
|